

![Mrs. Miller works in the guidance office. With all the many duties of her position she is working as the secretary for the guidance office. "[She] may change every period to a different class," Principal Scott Hinton said.](https://blueacemedia.org/wp-content/uploads/2024/09/sub-photo-1200x869.jpg)


BY GRACE MONTGOMERY (’16)
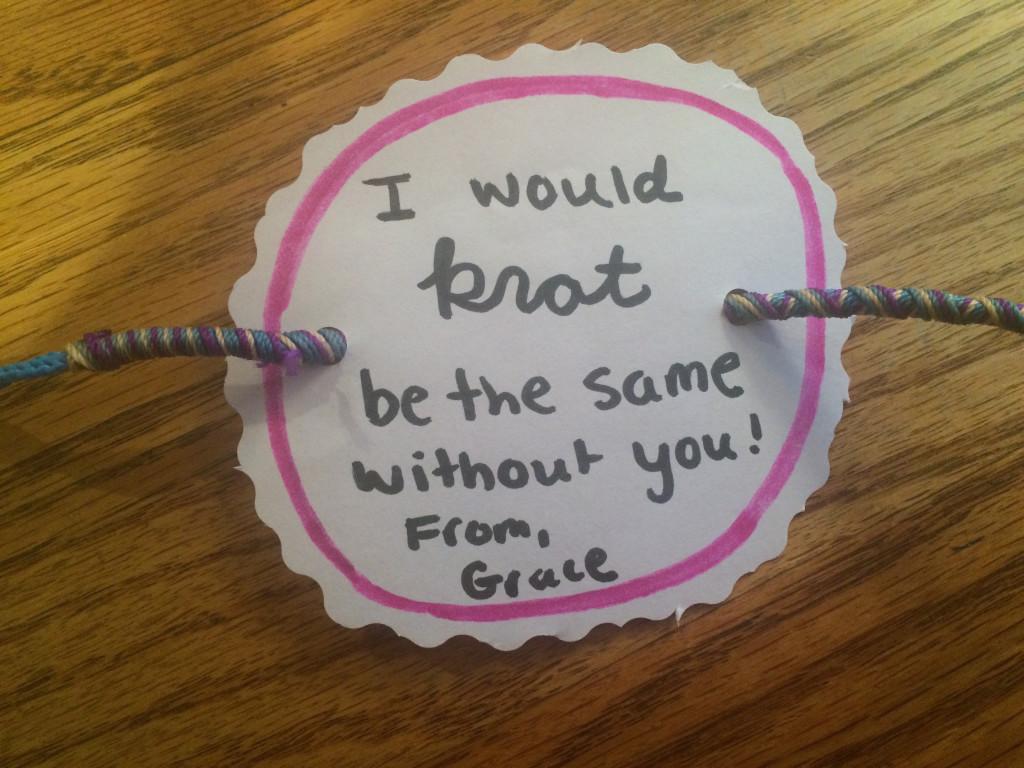
I want to dedicate this column to the broke kids during this holiday season. DIY, or do it yourself, is not only a cheaper way to give gifts, but it is also a personalized and authentic way to show your love for someone else. All of these gifts are really easy and cost effective to make. My good friend Madeline and I decided to make gifts for our friends and it only took us about an hour and half to make them all.
If you are looking for more ideas for the holiday season, I found these crafts on Pinterest just by looking up Christmas DIY gifts.
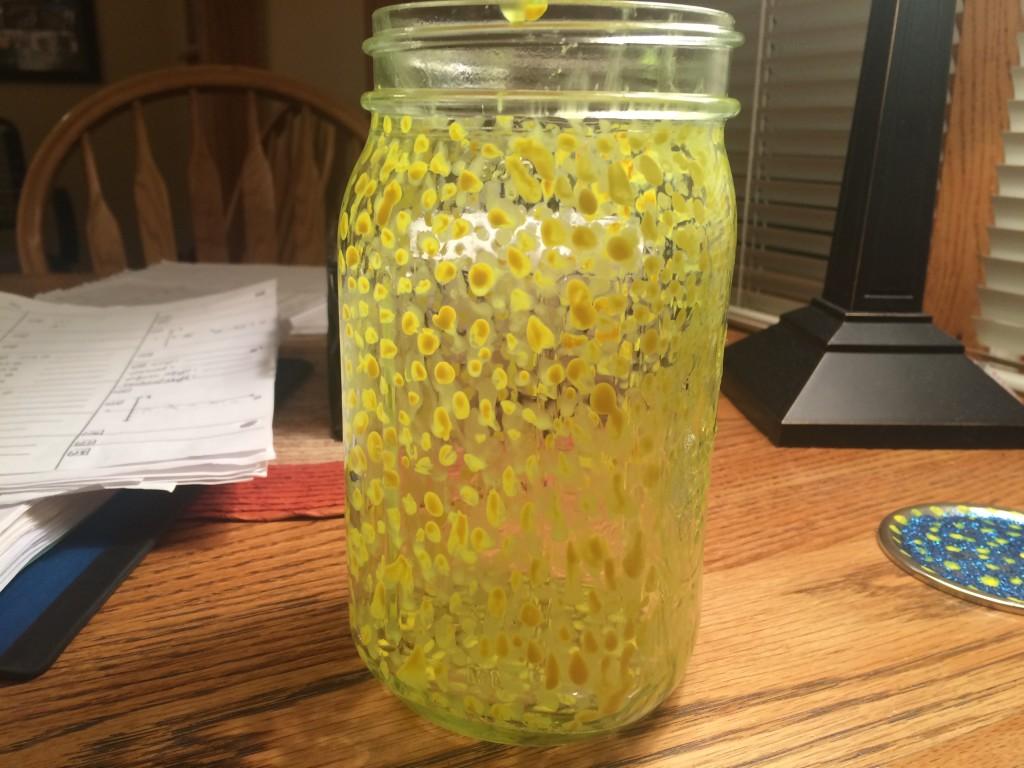
Ornament Fun it is to DIY (Pun intended)
What you need: Clear ornaments (Easily for single ones, I got a cheap back of 4 at Hobby Lobby for $4), Sticker Letters (I also went to Hobby Lobby), Glitter or Confetti, Optional Ribbon at the top, Funnel
Step 1: Stick the letters or words you want onto the ornament. You can use names, monograms, etc.
(You could also simply draw on an ornament and skip this next step)
Step 2: Use a funnel to fill with glitter or confetti. I suggest putting down a bundle of newspaper just to be safe.


Step 3: I then glued around the edge of the top metal part to the ornament to make sure it did not break when I put in on the tree.


Step 4(Optional): Tie on a festive bow to hang easier on the tree and more importantly look more stylish


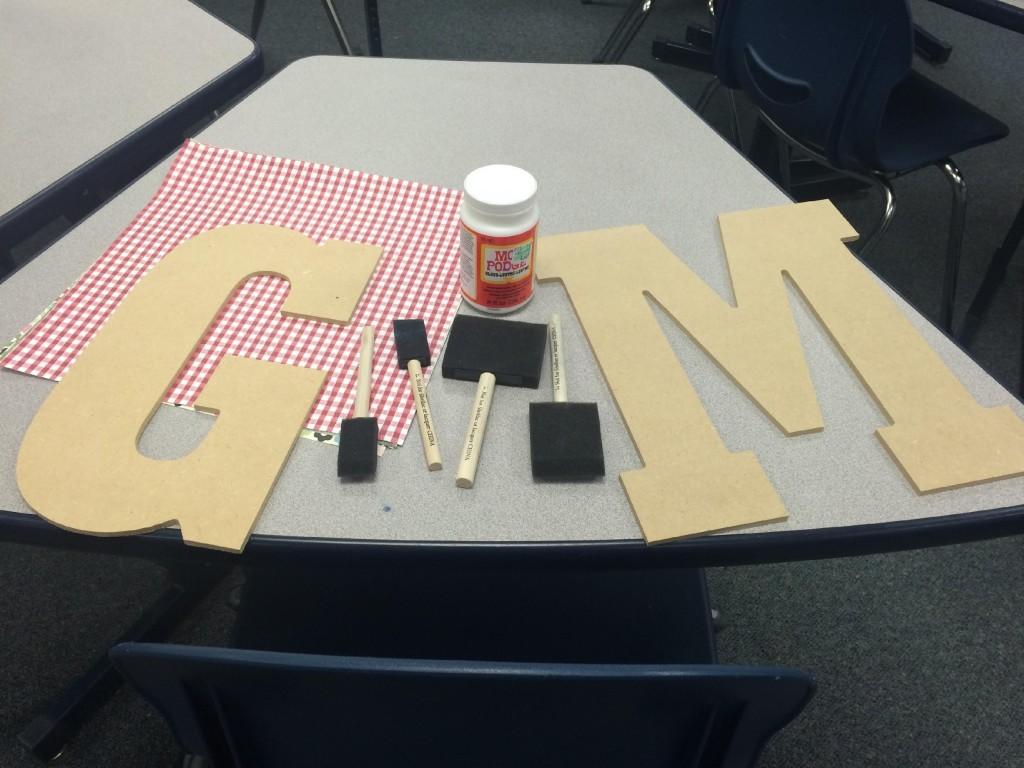
Letter Art: Spelling out your love
What you need: Wooden Letter, Mod Podge Gloss, A Foam Brush– All from Hobby Lobby, Pictures


Step 1: Get the photos you want to place on the letter. I will do mine all black and white just for cohesion.
Step 2: After deciding how to place your photos, put down Mod Podge for the size of one picture. Then apply the picture. Keep doing this process of adding Modge Podge to a single area than adding the picture until all the pictures are added.
Step 3: Wait 30 minutes and then put Mod Podge over to keep the photos from curling up, as well as to add a glossy finish.


If you are interested in putting paper into the background my friend Madeline brought 12 by 12 scrap book paper.
Another craft that is cost effective and easy to do is the 15 minute holiday mug. While I myself did not do this craft, it is quite effortless.
What you need: White mug or mugs (Cheap ones at the Dollar Store, Kohl’s, set of 8 at Target for same price)
Another craft that is cost effective and easy to do is the 15 minute holiday mug. While I myself did not do this craft, it is quite effortless.
Step 1: Get a sharpie (a regular one is fine) and say or draw whatever you want. I found doing a quote or a simple holiday message was fun.
Step 2: Bake for 30 minutes at 350 degrees in the oven
Step 3 (optional): add a packet of hot cocoa or candy
Note: I have come to find that the best way to maintain your design on your mug is to hand wash instead of running it through the dishwasher.

Once a month, Grace Montgomery shows how to make easy, inexpensive DIY projects to give as gifts or keep for yourself.